


Your home network is the front door to everything that matters — your bank accounts, your work files, your family’s devices, and your smart home gadgets. Right now, that front door is probably wide open.
Most people plug in their ISP-provided router, connect their devices, and never touch another setting. That is, however, one of the most dangerous things you can do in 2026. Cybercriminals are no longer just targeting corporations. Furthermore, home networks are actively and systematically attacked using automated tools that scan millions of IP addresses every single day.
This guide will walk you through exactly how to setup a completely secure home network from scratch — step by step, in plain language, without skipping the parts that actually matter. Whether you are building a new home network for the first time or completely overhauling an existing one, this is the only guide you need.
By the end, your network will be segmented, encrypted, monitored, and hardened in the same way professional IT teams secure business infrastructure — just scaled for home use.
Why Most Home Networks Are Dangerously Insecure in 2026
Before we get into the setup, you need to understand why this matters more today than ever before.
The average home now has 15 to 25 connected devices. Smartphones, laptops, smart TVs, baby monitors, security cameras, smart bulbs, thermostats, gaming consoles, and more all share the same network. Furthermore, every single one of those devices is a potential entry point for an attacker.
Your ISP router almost certainly runs outdated firmware. Additionally, its default admin password is either still set to “admin/admin” or something equally weak. WPS is probably enabled. UPnP is running in the background. Moreover, remote management might be on without you knowing.
According to CISA (Cybersecurity & Infrastructure Security Agency), the majority of home network breaches in recent years began with compromised IoT devices — gadgets most people never think to secure.
The solution is not paranoia. It is, however, architecture. A properly structured home network makes it nearly impossible for an attacker to pivot from one compromised device to your main laptop or home office workstation. Consequently, let us build that architecture now.
What You Need to Build a Secure Home Network
Before touching any settings, you need the right hardware. Using proper-grade networking equipment is not optional — it is, in fact, the foundation everything else sits on.
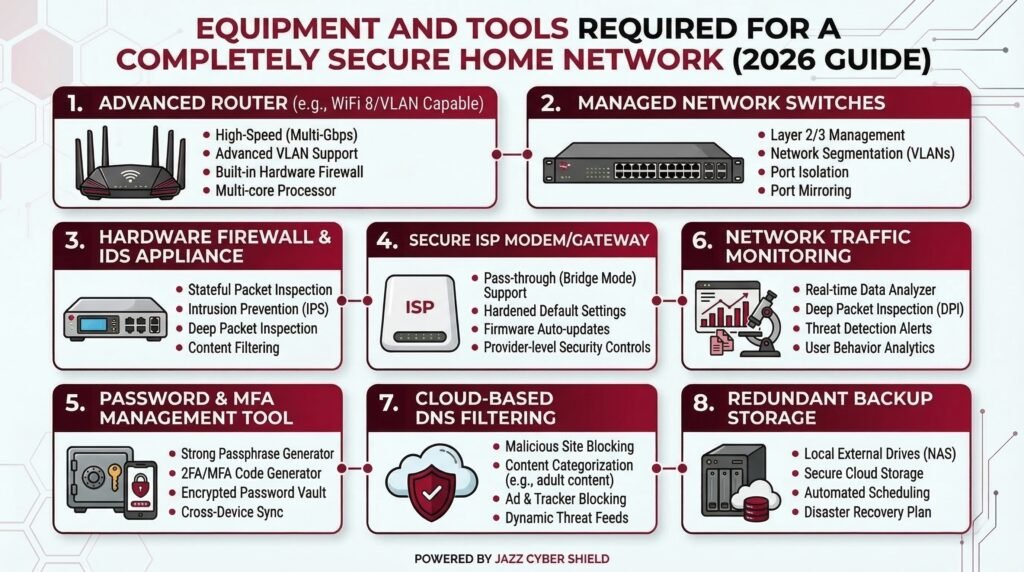
Here is your core hardware list:
1. A Business-Grade Router or Security Gateway Your ISP router is not designed for security. Instead, manufacturers design it to be cheap and easy to provision. For a truly secure network, therefore, you need a dedicated security gateway or a next-generation firewall. Options from Fortinet, SonicWall, and WatchGuard are exactly what professionals use, and they are fully available for home and small office deployment.
2. A Managed Network Switch An unmanaged switch just passes traffic. A managed switch, however, lets you create VLANs (Virtual Local Area Networks) — the single most powerful security feature for home networks most people never use. Cisco managed switches and HPE Aruba switches give you full VLAN control at the hardware level.
3. A Reliable Access Point Your router’s built-in Wi-Fi is usually mediocre. In contrast, a dedicated wireless access point gives you stronger signal, more configuration control, and better support for multiple SSIDs. Ubiquiti access points are widely regarded as the gold standard for home and prosumer setups.
4. A Hardware Firewall If your security gateway does not include deep packet inspection, adding a dedicated hardware firewall from our store gives you full visibility and control over every packet leaving and entering your network. Additionally, it acts as your last line of defence before traffic reaches your devices.
5. A Stable Internet Connection in Bridge Mode Set your ISP modem to bridge mode. As a result, it passes your public IP directly to your security gateway instead of double-NATting your traffic through two routers.
Step 1 — Set Your ISP Modem to Bridge Mode
This is the first and most overlooked step. Most ISP modems act as both a modem and a router, creating what professionals call a Double NAT. When you add your own router or security gateway behind it, you therefore end up with two layers of NAT that break VPN connections, slow performance, and reduce your firewall’s effectiveness.
Call your ISP or log into your modem’s admin panel and enable bridge mode (sometimes called “pass-through” mode). Once you enable it, your security gateway will handle all routing, firewalling, and DHCP. Your ISP modem becomes a passive signal converter — which is exactly what you want it to be.
Step 2 — Configure Your Security Gateway or Firewall
Once you connect your firewall or security gateway to the modem in bridge mode, it is time to configure it properly. This step has the most individual settings to work through, so we have broken it into clear sub-sections below.
Change All Default Credentials First
This sounds obvious, but it is the number one mistake people make. Go to the admin panel and set a unique, strong admin username and password immediately. Do not use your name, address, or anything guessable. Furthermore, avoid reusing credentials from other accounts.
Disable Features That Create Attack Surfaces
First, disable Remote Management entirely. You do not need to manage your firewall from outside your home network, and leaving it enabled creates a common attack vector. Next, disable UPnP (Universal Plug and Play). While UPnP makes device discovery easier, it also allows devices to open their own firewall ports without your approval — a well-documented security risk.
Enable the Security Features That Matter
Enable SPI (Stateful Packet Inspection). This feature tracks the state of all network connections and blocks traffic that does not match a known active session. All modern firewalls from Fortinet, SonicWall, and WatchGuard have this available — verify it is active.
Additionally, enable IDS/IPS (Intrusion Detection and Prevention System) if your firewall supports it. This engine recognises known attack signatures and blocks them in real time. Moreover, it logs every blocked attempt, giving you a clear picture of what your network faces daily.
Configure Secure DNS
Switch away from your ISP’s default DNS servers. Instead, use Cloudflare’s 1.1.1.1, Google’s 8.8.8.8, or a DNS filtering service like Cloudflare Gateway or Cisco Umbrella. These services block known malicious domains before your devices even connect to them. Furthermore, enabling DNS over HTTPS (DoH) prevents your ISP from reading your DNS queries in transit.
Tighten Your Outbound Firewall Rules
By default, most firewalls allow all outbound traffic. You can lock this down by creating rules that only permit traffic on ports your devices actually use — primarily 80, 443, and 53. Consequently, blocking everything else dramatically reduces the risk of malware phoning home undetected.
💡 Related Reading: Already have a firewall but not sure which settings to change first? Read our article on 7 Router Settings You Must Change Right Now — it covers the exact configurations most people skip.
Step 3 — Build Your VLAN Architecture (Network Segmentation)
This is the single most impactful security improvement you can make to your home network. If you do nothing else from this guide, do this. Furthermore, it costs nothing beyond the managed switch hardware you have already purchased.
A VLAN (Virtual Local Area Network) lets you create completely separate, isolated networks on the same physical hardware. In other words, devices on one VLAN cannot communicate with devices on another VLAN unless you explicitly allow it.
Here is the VLAN structure we recommend for a secure home network:
VLAN 10 — Trusted Devices (Main Network) This VLAN hosts your primary laptops, desktops, and phones — the devices you fully trust. No IoT device, no guest device, and no smart TV should ever share this network.
VLAN 20 — IoT Devices Smart bulbs, thermostats, smart speakers, and robot vacuums all go here. These devices are notoriously poorly secured. Consequently, isolating them means a compromised smart bulb cannot touch your laptop.
VLAN 30 — Security Cameras Security cameras deserve their own VLAN, particularly if you use IP cameras from brands like Hikvision or Axis. You want cameras to reach your NVR or cloud storage, but they should have zero access to the rest of your network.
VLAN 40 — Guest Network When visitors connect to your Wi-Fi, they should never have access to your main devices or IoT gear. A dedicated guest VLAN gives them internet access and nothing else. Moreover, you can rotate the guest Wi-Fi password without affecting any of your own devices.
VLAN 50 — Work / Home Office If you work from home, this VLAN isolates your work devices from everything else — protecting both your employer’s data and your personal network from cross-contamination.
💡 Related Reading: New to VLANs and want a deeper explanation? Our dedicated guide — What Is a VLAN and Why Every Home Network Needs One in 2026 — covers the concept in full detail with setup examples.
To implement VLANs, your managed switch and access point must support VLAN tagging (802.1Q). This is precisely why the hardware choices in the previous section matter so much. Consumer-grade gear cannot do this. However, professional-grade Cisco and HPE Aruba switches handle VLAN configuration natively and reliably.
Step 4 — Harden Your Wi-Fi Settings
Your wireless network is your most exposed attack surface. A neighbour, someone parked outside, or an attacker with basic equipment can attempt to break into your Wi-Fi without ever physically touching your property. Therefore, hardening your wireless settings is non-negotiable.
Use WPA3 wherever possible. WPA2 is still acceptable if WPA3 is unavailable, but WPA3 fixes several critical vulnerabilities in WPA2 — especially around brute-force attacks. Never use WEP or WPA. These protocols are broken, and you should disable them immediately.
Disable WPS (Wi-Fi Protected Setup). WPS was designed to make device connections easier. However, it also introduced a serious vulnerability — the WPS PIN attack — that allows an attacker to brute-force your network passphrase within hours. Turn it off completely.
Use separate SSIDs for each VLAN. If you have set up five VLANs as described above, create five separate Wi-Fi network names. Your access point can broadcast multiple SSIDs and tag each one to the correct VLAN. Additionally, your IoT devices get one SSID, guests get another, and your trusted devices get their own.
Use a strong, randomised Wi-Fi password. Use at least 20 characters and mix upper/lowercase letters, numbers, and symbols. A password manager can store it, so you do not need to memorise it.
Optionally hide your main trusted SSID. While this is not a primary defence on its own, hiding your main network name adds a layer of friction. Experienced attackers can still detect hidden SSIDs, so treat this as a supplementary measure only.
💡 Related Reading: For a complete checklist of wireless security settings, read our article on Wi-Fi 6 Router Security Settings You Must Change in 2026.
Step 5 — Secure Every Device Before It Joins the Network
The network is only as secure as the devices on it. Even with perfect firewall rules and VLAN segmentation, a device with default credentials or unpatched firmware is a serious liability. Therefore, you should harden every device before it connects.
Change Default Credentials on Every Device
This step applies to routers, cameras, smart home hubs, printers, and every other networked device. Do not skip printers — attackers exploit them regularly, and most people never change their default passwords.
Update All Firmware Before Connecting
Check the manufacturer’s website or admin panel for the latest firmware updates. Manufacturers patch security vulnerabilities through firmware updates. Consequently, running outdated firmware is the equivalent of leaving a known unlocked door in your wall. Furthermore, once you update, enable automatic updates wherever the device supports them.
Disable Features You Do Not Use
Turn off Telnet, FTP, SNMP (unless you actively use it), and any remote access features that the manufacturer enabled by default. These features exist for convenience, but they create unnecessary attack surfaces. Additionally, disabling them reduces the number of open ports on your devices, which in turn limits what a network scanner can discover.
Review App Permissions for Smart Devices
Many smart home apps request access to your contacts, location, microphone, and camera during setup. Revoke every permission that is not essential for the device to function. For example, a smart bulb app has no legitimate reason to access your contacts or location. Moreover, these permissions sometimes persist even after you uninstall the app, so review them regularly in your phone’s settings.
Step 6 — Set Up a VPN on Your Router or Firewall
A VPN (Virtual Private Network) at the router or firewall level encrypts all traffic leaving your home network before it reaches the internet. In other words, every device on your network gets VPN protection automatically — including IoT devices that cannot run a VPN app themselves. There are two main approaches to consider.
Option A — Run a VPN Server on Your Firewall (Self-Hosted) Your Fortinet or SonicWall firewall likely supports WireGuard or OpenVPN server configurations. This approach lets you connect back to your home network securely when you are away. Furthermore, it gives you complete control over your data without relying on a third-party provider.
Option B — Connect to a Commercial VPN Service Services like Mullvad, ProtonVPN, or NordVPN support router-level configuration. As a result, traffic from all your devices gets encrypted and routes through the VPN provider’s servers before reaching the internet. This option is faster to set up, but it does mean trusting a third party with your traffic.
💡 Related Reading: Before you choose, read our breakdown: Free VPN vs Paid VPN — The Truth They Hide (2026) to understand exactly what you are paying for.
Step 7 — Secure Your Security Cameras and Smart Devices
Here is an uncomfortable truth: your security cameras are often the least secure devices on your entire network. Poorly configured IP cameras have contributed to massive botnets, and many consumer-grade cameras carry serious vulnerabilities that manufacturers never patch.
If you are setting up home security cameras, follow these rules without exception. First, place cameras on their dedicated VLAN (VLAN 30 from our architecture above). Next, change the default admin credentials on each camera immediately after unboxing. If you only need local recording, disable cloud access entirely.
If you need remote viewing, create a VPN tunnel instead of port-forwarding your camera’s HTTP port directly to the internet. Port-forwarding your camera to the public internet is one of the riskiest things you can do on a home network. In contrast, a VPN tunnel achieves the same result without exposing the camera to public scanners.
Additionally, use cameras from reputable vendors. Hikvision and Axis Communications both receive regular firmware updates and publish security advisories — unlike many no-name camera brands that manufacturers abandon shortly after release.
💡 Related Reading: We wrote an entire article on this specific threat. Read: Is Someone Watching? How Hackers Access Your Security Cameras — and How to Stop Them for the full breakdown.
The same logic applies to baby monitors and smart speakers. For device-specific advice, see our articles on baby monitor security and how smart TVs collect and leak your data.
Step 8 — Enable Network Monitoring and Alerts
A secure network is not a “set it and forget it” system. Threats evolve. Devices get compromised. Firmware becomes outdated. Therefore, you need ongoing visibility into what is happening on your network.
Most business-grade firewalls include built-in logging and monitoring dashboards. Here is what to configure:
Enable IDS/IPS. Fortinet, SonicWall, and WatchGuard firewalls all include IDS/IPS engines that recognise known attack signatures and block them in real time. Make sure this feature is active and that the threat database updates automatically.
Configure email or SMS alerts for unusual activity. Most security gateways can send alerts when a new device joins your network, when traffic patterns change dramatically, or when a blocked intrusion attempt occurs. Consequently, you get notified of suspicious events without manually checking logs every day.
Review DHCP lease tables regularly. Every device that connects gets a DHCP lease. Reviewing this list periodically lets you spot unknown devices immediately. For example, a rogue phone connected to your network will appear in this table with an unfamiliar hostname.
Use a network scanning tool. Free tools like Angry IP Scanner or the paid Fingbox let you scan your home network and see every connected device, what ports are open, and what each device is doing. Additionally, some of these tools alert you automatically when new devices appear.
Log your DNS queries. If you use Cloudflare Gateway or a Pi-hole, you can review every DNS query from every device on your network. This is one of the most reliable ways to detect a compromised device. Specifically, infected devices regularly reach out to command-and-control servers, and those DNS queries will appear clearly in your logs.
Step 9 — Keep Everything Updated (Your Ongoing Responsibility)
Security is not a project with a completion date. It is, furthermore, an ongoing practice that requires consistent attention. The good news is that a simple monthly routine covers most of what you need.
Schedule a monthly maintenance checklist:
- Check for firmware updates on your firewall, switch, access point, and all smart devices
- Review your firewall rules — some may have become unnecessary over time
- Check whether any unexpected devices have joined your network
- Rotate your Wi-Fi passwords every six months, and rotate guest network passwords more frequently
- Review all user accounts on your firewall and router — delete any that you no longer need
- Additionally, check the National Vulnerability Database at nvd.nist.gov for CVE advisories related to your specific hardware models
This routine does not need to take long. A 30-minute monthly session can mean the difference between a network that stays secure and one that silently falls under attacker control over several months. Consequently, block the time in your calendar and treat it as non-negotiable.
Complete Hardware Shopping List for a Secure Home Network
To make this easier, here is a direct reference to the equipment categories you need, all available at Jazz Cyber Shield:
- Firewalls & Security Gateways: Browse Fortinet Firewalls | SonicWall Firewalls | WatchGuard Firewalls
- Managed Network Switches: Cisco Switches | HPE Aruba Switches
- Wireless Access Points: Browse All Access Points
- IP Security Cameras: Hikvision Cameras | Axis Communications
- All Networking Products: Visit the Full Shop
Quick-Reference: Secure Home Network Checklist
Hardware Setup
- ISP modem set to bridge mode
- Security gateway / firewall installed and connected
- Managed switch installed
- Dedicated wireless access point configured
Firewall Configuration
- Default admin credentials changed
- Remote management disabled
- UPnP disabled
- SPI (Stateful Packet Inspection) enabled
- DNS over HTTPS or secure DNS configured
- Outbound firewall rules tightened
- IDS/IPS enabled and auto-updating
Wi-Fi Security
- WPA3 or WPA2 enabled (WEP/WPA removed)
- WPS disabled
- Separate SSIDs per VLAN
- Strong, unique Wi-Fi passwords set
VLAN Segmentation
- VLAN 10: Trusted devices
- VLAN 20: IoT devices
- VLAN 30: Security cameras
- VLAN 40: Guest network
- VLAN 50: Work devices (if applicable)
- Inter-VLAN routing rules configured
Device Hardening
- Default credentials changed on all devices
- All firmware updated
- Unnecessary features disabled
- IoT app permissions reviewed and reduced
Monitoring
- DHCP tables reviewed
- Email/SMS alerts configured
- DNS query logging enabled
- Monthly maintenance schedule set
Frequently Asked Questions (FAQ)
Q1: What is the most important step in securing a home network? Network segmentation through VLANs delivers the most impact for the least cost. It ensures that even if one device gets compromised — for example, a smart TV or an IoT sensor — the attacker cannot move laterally to your main computer or access sensitive files. Additionally, combining VLAN segmentation with a properly configured hardware firewall forms the foundation of a genuinely secure home network.
Q2: Do I really need a hardware firewall for my home network? For most households, yes — especially if you work from home, run a home business, or have more than 10 connected devices. Your ISP router provides almost no meaningful security beyond basic NAT. In contrast, a dedicated hardware firewall from brands like Fortinet or SonicWall delivers IDS/IPS, deep packet inspection, application control, and real-time threat intelligence that consumer routers simply cannot offer.
Q3: What is the difference between WPA2 and WPA3? WPA3 introduces Simultaneous Authentication of Equals (SAE), which replaces the WPA2 handshake and eliminates brute-force dictionary attacks. Furthermore, it enables forward secrecy, meaning attackers cannot decrypt captured traffic even if they later discover your password. Therefore, if your devices support WPA3, you should enable it immediately.
Q4: Should I hide my Wi-Fi SSID? Hiding your SSID adds a minor layer of obscurity. However, experienced attackers easily detect hidden SSIDs using passive scanning tools. Consequently, do not treat this as a primary defence. Strong encryption, a solid password, and VLAN segmentation matter far more.
Q5: How do I know if someone has already hacked into my home network? Watch for these warning signs: unexplained slowdowns at consistent times, unknown devices in your DHCP table, DNS queries to unfamiliar domains in your logs, changes in router settings you did not make, and devices acting strangely — particularly cameras and smart speakers. Additionally, running a network scan using Angry IP Scanner can reveal devices you did not know were connected.
Q6: How often should I change my home Wi-Fi password? Change your main network password every 6 to 12 months. Moreover, rotate it immediately after a guest accesses it, a device gets compromised, or your household occupants change. Your guest network password should rotate more frequently — every 30 to 90 days is a reasonable target.
Q7: Is a VPN on my router worth it? Yes, especially if you have IoT devices that cannot run a VPN client on their own. A router-level VPN simultaneously encrypts all outbound traffic from every device on your network. It also protects you from ISP-level traffic monitoring. The trade-off is slightly reduced speeds, but for a security-conscious home network, the protection is worth the minor performance cost.
Q8: Can I build a secure home network on a budget? Yes, with some trade-offs. You can start with an entry-level firewall, a basic managed switch, and a reliable access point. Even at a tight budget, you can implement VLANs, WPA3, and IDS/IPS. The key, however, is to buy the right categories of hardware rather than simply the cheapest consumer gear. Entry-level professional networking equipment outperforms expensive consumer gear on every security metric that matters.
Related Topics Worth Reading
If this guide was useful, these related articles from Jazz Cyber Shield will take your network security further:
- What Is a VLAN and Why Every Home Network Needs One in 2026 — Deep-dive on VLAN setup and configuration
- 7 Router Settings You Must Change Right Now — Quick-action checklist for your existing router
- Wi-Fi 6 Router Security Settings You Must Change in 2026 — Specific to Wi-Fi 6 hardware and its unique security features
- How Hackers Access Your Security Cameras — and How to Stop Them — Essential reading if you have IP cameras
- Someone Is Watching Your Baby Monitor — Here’s How to Stop It — Baby monitor security in detail
- Your Smart TV Is Spying on You — Here’s the Proof and the Fix — ACR technology and smart TV data collection
- Free VPN vs Paid VPN: The Truth They Hide (2026) — Understanding what you are paying for in a VPN
Recommended Products From Jazz Cyber Shield
Everything you need to build the network described in this guide is available at our store. Moreover, every product we stock is what actual network engineers deploy — not rebranded consumer electronics.
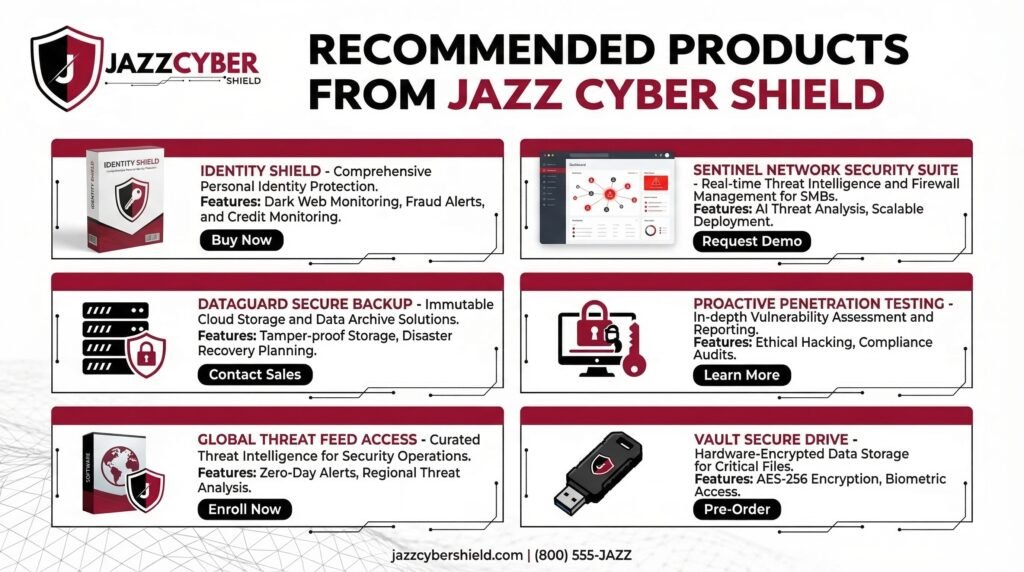
Firewalls and Security Gateways Protect your entire network at the perimeter. Brands: Fortinet, SonicWall, WatchGuard
Managed Switches for VLAN Support The backbone of your network segmentation setup. Brands: Cisco, HPE Aruba
Enterprise-Grade Wireless Access Points Multi-SSID, VLAN-tagged wireless networking for every room. Browse: All Access Points
Professional IP Security Cameras Cameras that receive regular firmware and security updates. Brands: Hikvision, Axis Communications
→ Browse the Full Jazz Cyber Shield Store
Final Word
Building a secure home network from scratch is not something you do once and forget. It is a layered system — hardware, configuration, segmentation, monitoring, and ongoing maintenance all working together. No single product or setting makes you completely safe. However, a properly architected network with the right hardware makes you an extremely unattractive target compared to the millions of people running default-configuration ISP routers.
You do not need to be a network engineer to accomplish this. You simply need to take it step by step, as this guide has laid out. Moreover, the hardware to do it properly is more accessible and affordable today than ever before.
If you need help choosing the right firewall, managed switch, or access point for your specific home setup, our team at Jazz Cyber Shield is ready to help. Browse our full range of networking and cybersecurity hardware — every product we stock is something a professional network engineer would actually deploy.