


In our connected world today, it has become very important to segment the network for security and performance. VLANs (Virtual LANs) on a network switch behind the router provide one of the best methods. Setting up VLANs the right way can mitigate complexity and ensure a smoother, safe, and fast network experience. This blog offers tips from the pros for setting up VLANs in an efficient manner while enhancing the performance of the network.
Why use VLANs in a home or office network?
To begin with, VLANs help isolate device traffic between each other for security improvement and lessening broadcast traffic. For example, IoT devices can be separated from the computers or might demarcate guest Wi-Fi users from internal file servers. Thus one VLAN cannot speak with another VLAN by default unless allowed through explicit configuration. Two more advantages include simplifying the management of the network and logically grouping devices instead of in a physical manner.
Step 1: Investigate the Fundamentals of Your Network Topology
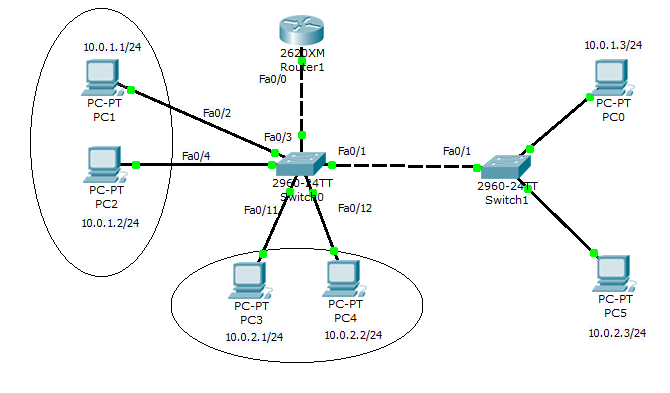
Now draw your network on paper. The switch must be VLAN-enabled and managed; without that, your VLAN traffic is unable to get proper handling, leading essentially to far more misrouted or subsequently dropped packets. Additionally, make sure your router can actually perform Layer 3 routing for the inter-VLAN traffic whenever required.
Step 2: Configure VLANs on the Switch
Now that your topology is uncluttered, you can now establish and assign your VLANs to this switch. Give each group a clear unique VLAN ID (e.g., IoT-VLAN-10 for IoT, Admin Systems-VLAN-20). Assign all the corresponding ports either as access or trunk. Access ports will carry traffic for one VLAN and trunk ports will carry multiple VLANs tagged.
Access the management interface of your switch through web-based or command line interface (CLI) to go ahead and set up the VLAN. Make a point of naming the VLAN descriptively to avoid ambiguity in your future references.
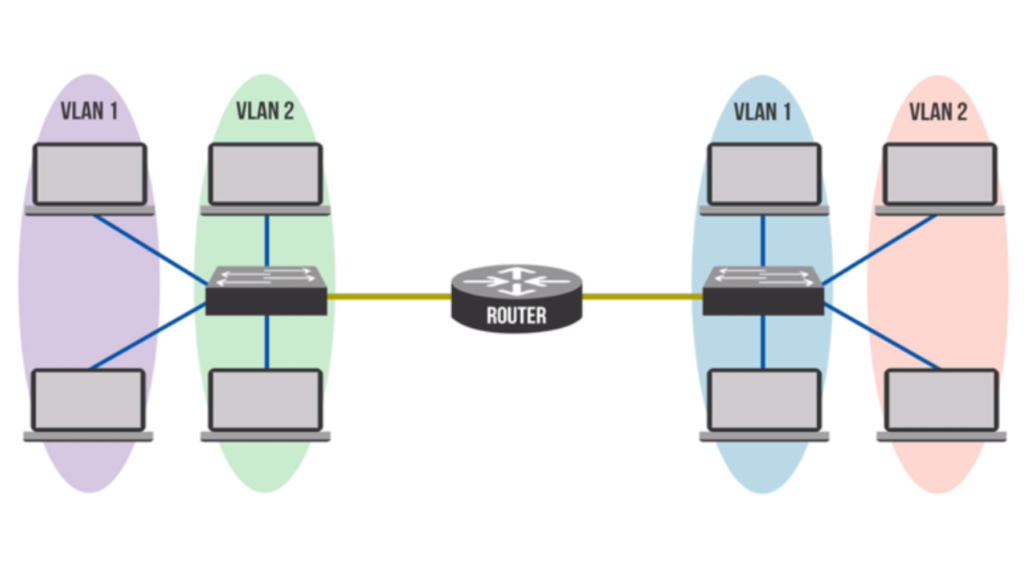
Step 3: Configure VLANs with Router Subnets
Once you have configured the VLANs on your switch, your router needs to be able to learn how these VLANs are handled. This often entails sub-interface configuration or use of a router with VLAN tagging. For example, VLAN 10 could use the subnet 192.168.10.0/24. This enables the router to route cross-VLAN traffic and act as the default gateway for all segments.
Thus, devices in the same VLAN can communicate freely among themselves, but possible communication between VLANs is restricted by the router’s firewall rules.
Step 4: Security Improve through VLAN Best Practices
Security shouldn’t be an afterthought. First, disable all unused ports and assign them to an unused VLAN. Second, do not use VLAN 1 for production devices. It is usually the default and tends to become popular with attackers. Finally, use ACLs (Access control lists) to restrict those VLANs that are allowed to communicate among them.
Additionally, keep an eye on traffic patterns to catch anomalies and misconfigurations early on. When correctly implemented, VLANs can significantly lessen the attack surface and provide greater decisions in the terms of who gets access to what.
Step 5: Test and Troubleshoot
Once the configuration is implemented, it is time to test all the VLANS thoroughly. Test VLAN isolation and routing using tools such as ping, traceroute, or network analyzers. If these tests do not pass, check port tagging, IP assignments, and firewall rules. Even the smallest misconfigurations, such as an improperly tagged trunk port, can cause quite a stir in a network.
Thus, to avoid the need to rework the troubleshooting process, a configuration log must be kept and settings must be backed up continuously.
Last Notes
At first blush it does seem quite a bit technical as far as setting up VLAN to a switch behind your router, but it can be made more secure and serve you better regarding your network. The same is true for homes and offices. You don’t just get better traffic management, but also considerably strengthen your network security posture.