



Last updated: October 14, 2026 · By the Jazz Cyber Shield networking team
Office access point placement works best when you mount access points on the ceiling in the open areas where people actually sit, space them roughly 30 to 50 feet apart in a staggered grid, keep them off columns and out of furniture, and size the count for both coverage and the number of connected devices.
That is the short answer. The rest of this guide explains each rule with figures from HPE Aruba and Cisco design documentation, shows the simple math for counting access points, and lists the mistakes we see most often when businesses ask Jazz Cyber Shield, a US-based reseller of networking and cybersecurity hardware, to help fix slow office Wi-Fi.
Key takeaways
- For office access point placement, HPE Aruba’s campus design guide recommends spacing indoor APs 30-50 feet (10-15 meters) apart.
- The same guide plans for 30-40 clients per AP and about 2.5 Wi-Fi devices per user with a 50% connection rate.
- Mount ceiling APs horizontally at 12-25 feet, and do not hide them above drop ceilings.
- Keep APs off columns, pillars and I-beams, and never put them inside bookcases or credenzas.
- Cisco advises keeping electrical wiring and Ethernet cables out of the 6-15 inch near field of the antenna.
Why Does Office Access Point Placement Matter?
Office access point placement decides whether you get the speed you paid for. A premium Wi-Fi 6 or Wi-Fi 6E access point mounted in the wrong spot will deliver weaker signal, more interference and worse roaming than a mid-range model mounted correctly.
Most office Wi-Fi complaints we hear are not hardware faults. They are placement faults: an AP hidden in a server closet, two APs side by side on the same wall, or one AP expected to serve an entire floor. Good office access point placement fixes those problems before they start, and it costs nothing extra beyond planning time.
There are two goals to balance:
- Coverage: every seat, meeting room and hallway gets a strong, clean signal.
- Capacity: each AP serves a number of devices it can actually handle at busy times.
Coverage alone is the old way of thinking about office access point placement. Today a typical employee carries a laptop, a phone and often a tablet or smartwatch, so capacity usually drives the final AP count in modern offices.
How Far Apart Should Office Access Points Be?
Start office access point placement with 30 to 50 feet between access points. HPE Aruba’s Radio Frequency Design guide for campus networks states: “Space APs 30-50 feet (10-15 meters) apart,” as the starting point for indoor omnidirectional APs in a typical open office.
Use the shorter end of that range when walls are dense or when many people share the space. Use the longer end for open-plan floors with drywall partitions. The same guide notes that cinder block and other dense materials impede signal more than drywall, so construction matters as much as floor area in office access point placement.
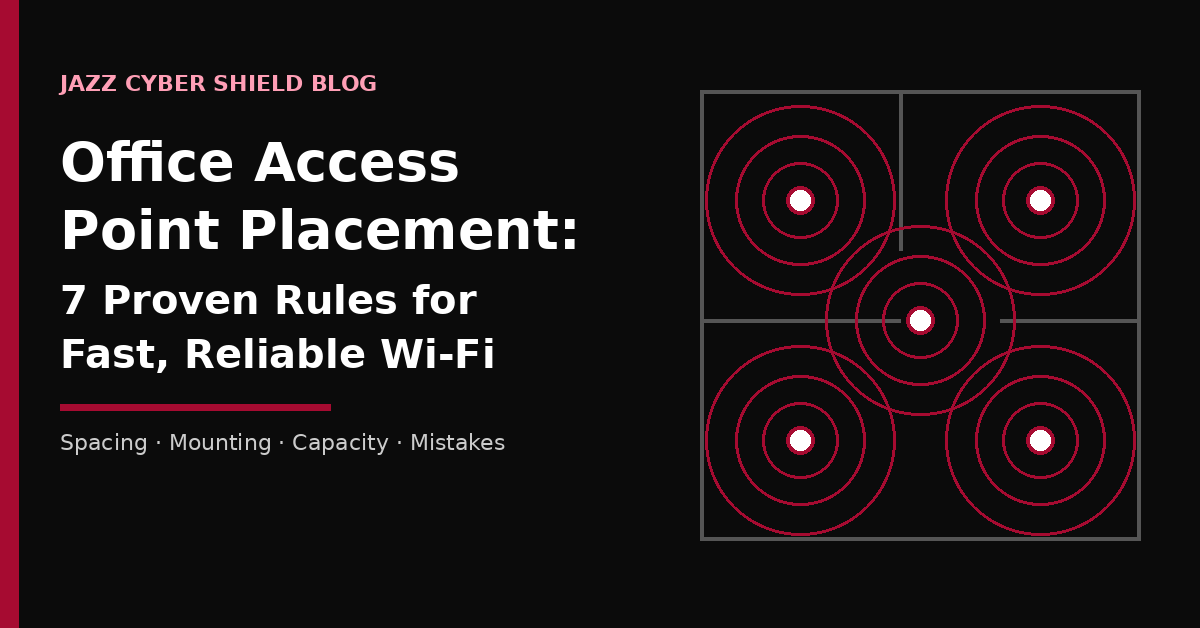
Aruba also recommends a staggered layout. Instead of lining APs up in straight rows, offset each row so the spacing between neighbors is equal in all directions. That gives even coverage and smoother roaming as people walk between rooms.
Office access point placement by floor type
The table below turns the 30-50 foot guideline into practical starting points. These are planning estimates for a first draft, not a replacement for a site survey.
| Office environment | Suggested AP spacing | Why | Watch out for |
|---|---|---|---|
| Open-plan floor, drywall partitions | 40-50 ft | Few obstacles; signal travels well | Too many APs causing co-channel interference |
| Mixed private offices and cubicles | 35-40 ft | Interior walls add loss | Corner offices at the edge of coverage |
| Concrete or cinder block walls | 30-35 ft | Dense walls absorb more signal | Rooms that need their own AP |
| Conference rooms and training rooms | Add a dedicated AP | Many devices in one small area | Meeting-time congestion |
| Warehouse or high-ceiling space | Survey required | Racking and height change the RF picture | Using office rules in an industrial space |
How Many Access Points Does an Office Need?
For office access point placement, you need whichever number is larger: the count required for coverage or the count required for capacity. Calculate both and use the higher figure.
For capacity, HPE Aruba’s design guide plans for 30-40 clients per AP and assumes 2.5 Wi-Fi devices carried per user with a 50% connection rate. That means each person adds about 1.25 active devices at any moment.
Worked example: a 20-person office
- Capacity: 20 people x 2.5 devices x 50% = 25 active devices. One AP can handle that on paper.
- Coverage: a 4,500 square foot floor with 40-foot spacing gives each AP roughly a 40 x 40 foot zone (1,600 square feet), so about three APs are needed.
- Result: three APs. Coverage wins, not capacity.
Worked example: a 60-person open office
- Capacity: 60 x 2.5 x 50% = 75 active devices. At 30-40 clients per AP, that is two to three APs.
- Coverage: a 6,000 square foot open floor at 45-foot spacing (about 2,000 square feet per AP) needs about three APs.
- Result: three APs, plus one more if the floor has a large boardroom that fills up at once.
The grid math is a simplification we use for quick estimates. Real walls, glass, elevators and kitchens change the outcome, which is why the final step of any office access point placement plan is verification on site.
Should You Mount Access Points on the Ceiling or the Wall?
Mount them on the ceiling whenever you can; it is the single most important office access point placement decision. Most enterprise APs use internal omnidirectional antennas designed to radiate downward and outward from a ceiling, like a lamp lighting a room.
Cisco’s Catalyst 9100 access point deployment guide explains that the internal antenna model “was designed to mount to a ceiling to provide 360-degree coverage.” It advises against wall-mounting internal-antenna APs unless you use an optional right-angle mount, and warns that a wall-mounted AP may push signal into the floors above and below.
HPE Aruba gives the same direction. Its guide says AP-xx5 series APs should be mounted horizontally with the radome (the white surface) facing down, and that a wall mount should use a 90-degree bracket that supports the AP model.
What is the right mounting height?
HPE Aruba recommends a mounting height of 12-25 feet (4-8 meters). Most US offices with standard drop ceilings fall comfortably in that window, so office access point placement rarely needs special brackets for height. Very high ceilings in lobbies or warehouses need a different design, often with directional antennas.
Can you hide an access point above a drop ceiling?
Avoid it. Aruba’s guide says, “In general, do not install APs above drop ceilings,” because the tiles add attenuation between the AP and users. Cisco agrees that above-ceiling installation should happen only when mounting below the ceiling is not an option, and the tiles must not be conductive.
| Mounting option | Coverage pattern | Recommended? | Notes |
|---|---|---|---|
| Ceiling, radome facing down | Even 360-degree coverage | Yes, first choice | Matches how internal antennas are designed |
| Wall with 90-degree bracket | Close to ceiling pattern | Acceptable | Use the bracket made for that AP model |
| Flat on a wall, no bracket | Lopsided; leaks to other floors | No | Common in DIY installs |
| Above drop ceiling tiles | Weakened by tile loss | Last resort only | Tiles must not be conductive |
| Inside furniture or a closet | Heavily blocked | No | Aruba warns against credenzas and bookcases |
What Should You Keep Away From Access Points?
Good office access point placement keeps metal, dense structure, cabling and other radio sources away from the AP. Each one bends, blocks or competes with the signal.
- Columns and beams: Aruba advises avoiding building columns, pillars and I-beams, which create RF shadows.
- Furniture: do not install APs in credenzas, bookcases or other furniture.
- Metal objects: Cisco warns that mounting near metal can change the coverage area, and areas with a lot of metal need a site survey.
- Cabling: Cisco advises not to route electrical wiring or Ethernet cables in the near field (6 to 15 inches) of the antenna.
- Interference sources: Cisco Meraki’s range and signal strength guide names cordless phones, microwave ovens and neighboring access points.
The break room is the classic trap. An AP mounted directly above the microwave and the refrigerator will struggle every lunch hour. Move it to the open seating area nearby instead. That one office access point placement change often fixes lunchtime complaints.
7 Proven Office Access Point Placement Rules
These seven rules summarize the guidance above into a checklist you can hand to an installer. Following them gets most small and mid-sized offices to strong, even Wi-Fi without guesswork.
Rule 1: Put APs where people work, not where cables end
The network closet is convenient for cabling but almost never the right spot for an AP. Run the cable to the open area instead. A short extra cable run is cheaper than a second AP to cover a dead zone, which makes this the first office access point placement rule.
Rule 2: Use a staggered grid at 30-50 feet
Offset rows so every AP sits an equal distance from its neighbors. This is the simplest way to apply office access point placement guidance to an irregular floor plan.
Rule 3: Mount on the ceiling, radome down
Ceiling mounting gives the pattern the antenna was designed for. If you must use a wall, use the 90-degree bracket made for that model.
Rule 4: Give meeting rooms their own capacity
Aruba’s guide calls out conference rooms, atriums and event areas as places to add APs. A boardroom with 20 people and 40 devices behaves very differently from the open floor around it.
Rule 5: Do not cluster APs
Two APs side by side do not double the speed. Cisco recommends avoiding clustering access points or antennas together, and reusing channels rather than putting every AP on the same one.
Rule 6: Plan 2.4 GHz carefully
With many dual-band or tri-band APs, the 2.4 GHz band overlaps quickly. Aruba notes that 2.4 GHz radios on some APs should be turned off to reduce co-channel interference, and recommends 20 MHz channels on that band.
Rule 7: Re-check office access point placement for 6 GHz
If you are upgrading to Wi-Fi 6E or Wi-Fi 7, do not assume the old 5 GHz layout carries over. Aruba’s guide notes that the 6 GHz band may propagate differently, so AP placement may not match the 5 GHz design.
What Are the Most Common Office Access Point Placement Mistakes?
The most common office access point placement mistakes are hiding APs, under-counting devices and copying a home Wi-Fi setup into an office. Each one is easy to avoid once you know to look for it.
- One “powerful” AP for the whole floor. Higher transmit power reaches farther, but phones and laptops transmit weakly back. The connection is only as strong as the weaker side.
- APs above the ceiling for looks. It looks tidy, but the tiles cost signal. Modern APs are designed to be seen.
- Ignoring the second floor. A wall-mounted AP can leak signal through the floor and interfere with the office above or below.
- Planning for people, not devices. Twenty people can mean 50 devices. Use the 2.5 devices per user figure in your math.
- Skipping PoE planning. Every ceiling AP needs a cable and power. Check your switch’s PoE budget before ordering.
- No verification. Cisco recommends verifying coverage with the worst-performing client you plan to use, not the newest laptop in the building.
The PoE point catches many projects late. If your current switch cannot power the new APs, compare options in our PoE network switches range before installation day rather than after.
How Do You Plan and Verify Office Access Point Placement Step by Step?
Plan office access point placement from a floor plan: estimate, mark, install, then measure. Six steps cover most offices under a few floors.
- Get a scaled floor plan. Mark wall types: drywall, glass, concrete, elevator shafts and kitchens.
- Count users and devices. Multiply headcount by 2.5 and by 50% to estimate active devices, then divide by 30-40 clients per AP.
- Draw a staggered grid. Start at 30-50 foot spacing, tighter for dense walls, and add APs to meeting rooms.
- Move marks to good mounting points. Avoid columns, beams, light fixtures and HVAC vents. Keep power and Ethernet runs clear of the antenna near field.
- Install and configure. Mount on the ceiling, radome down. Use 20 MHz channels on 2.4 GHz and disable some 2.4 GHz radios if they overlap.
- Walk and measure. Aruba’s guide uses RSSI targets between -55 dBm and -65 dBm to drive cell size, closer to -55 dBm for high-density designs. Check the far corners, meeting rooms and the break room.
What signal strength should office access point placement aim for?
Aim for at least -65 dBm everywhere people work, and closer to -55 dBm in busy areas. Those are the RSSI targets in HPE Aruba’s campus RF design guide, and a free Wi-Fi analyzer app on a laptop can show the reading as you walk the floor.
If a spot falls below target, move the nearest AP before adding a new one. Small changes in office access point placement often fix a weak area, and Meraki’s guidance also suggests testing different locations and measuring the result.
Which Access Points Suit Common Office Layouts?
Ceiling-mount, PoE-powered business APs suit almost every office and make office access point placement simpler. The right family depends on how many sites you manage and how much control your IT team wants.
- Small offices with no full-time IT: app-managed APs that need no controller are the simplest choice. Our Aruba AP22 vs AP25 comparison explains how two popular small-business models differ.
- Growing businesses comparing platforms: read our Aruba vs Ubiquiti wireless comparison before committing to an ecosystem.
- Fortinet firewall users: FortiAP units can be managed from the FortiGate. See our guide on FortiAP vs a standard router.
- Multi-floor or high-density offices: enterprise APs with tri-band radios and centralized management give finer control over power and channels.
Whatever you choose, the office access point placement rules stay the same. You can browse ceiling-mount models in our business wireless access points collection, and pair them with switches from our HPE Aruba switches range if you want one management platform for wired and wireless.
Frequently Asked Questions About Office Access Point Placement
How far apart should access points be in an office?
HPE Aruba’s campus design guide recommends spacing indoor APs 30-50 feet (10-15 meters) apart. Use the shorter distance for concrete or cinder block walls and the longer distance for open-plan floors with drywall.
How many devices can one access point handle in an office?
HPE Aruba plans for 30-40 clients per AP in its campus design guidance. It also assumes about 2.5 Wi-Fi devices per user with a 50% connection rate, so 20 employees produce roughly 25 active devices.
Is it better to mount an access point on the ceiling or the wall?
The ceiling is better for most business APs because their internal antennas are designed for downward 360-degree coverage. If you must mount on a wall, use the 90-degree bracket designed for that AP model.
Can I put an access point above a drop ceiling?
Only as a last resort. HPE Aruba advises not installing APs above drop ceilings because the tiles add attenuation, and Cisco says above-ceiling installs should use non-conductive tiles and happen only when mounting below the ceiling is not possible.
What signal strength should office Wi-Fi have?
HPE Aruba’s design guide uses RSSI targets from -55 dBm to -65 dBm. Aim for at least -65 dBm where people work and closer to -55 dBm in high-density areas such as conference rooms.
Do I need a new layout when upgrading to Wi-Fi 6E or Wi-Fi 7?
Check it before reusing the old one. HPE Aruba notes that the 6 GHz band can propagate differently from 5 GHz, so AP placement for 6 GHz may not match an existing 5 GHz design.
Next Steps: Get Office Access Point Placement Right the First Time
Good office access point placement comes down to a few habits: ceiling mounting, 30-50 foot staggered spacing, enough APs for your devices, and a walk test at the end. Get those right and almost any modern business AP will perform well.
Ready to equip your office? Browse our best access points for business to compare ceiling-mount business models. Planning a multi-floor rollout or a bulk order? Send Jazz Cyber Shield your floor plan and headcount and request a project quote. Our team will help you match access points, PoE switches and licensing to your space.

